Tooling for Apache Camel K by Red Hat
![]()
This is the support for Apache Camel K functionality for Visual Studio Code
Your First Apache Camel K Integration
After your Apache Camel K/Minikube environment is running and you have installed the Tooling for Apache Camel K (vscode-camelk) extension, you can quickly start your first integration.
- Create a directory on your development system called integrations. For example,
/home/(User_Name)/Documents/integrationson Linux orC:\Users\(User_Name)\Documents\integrationson Windows. - Start a new workspace in your VS Code Integrated Development Environment (IDE).
- Add the folder from step 1 to your new workspace with File > Add Folder to Workspace…
- Call command
Camel: Create Camel route in Yaml DSL - Right-click on created file in your directory and select Deploy Integration with Apache Camel K.
- Select
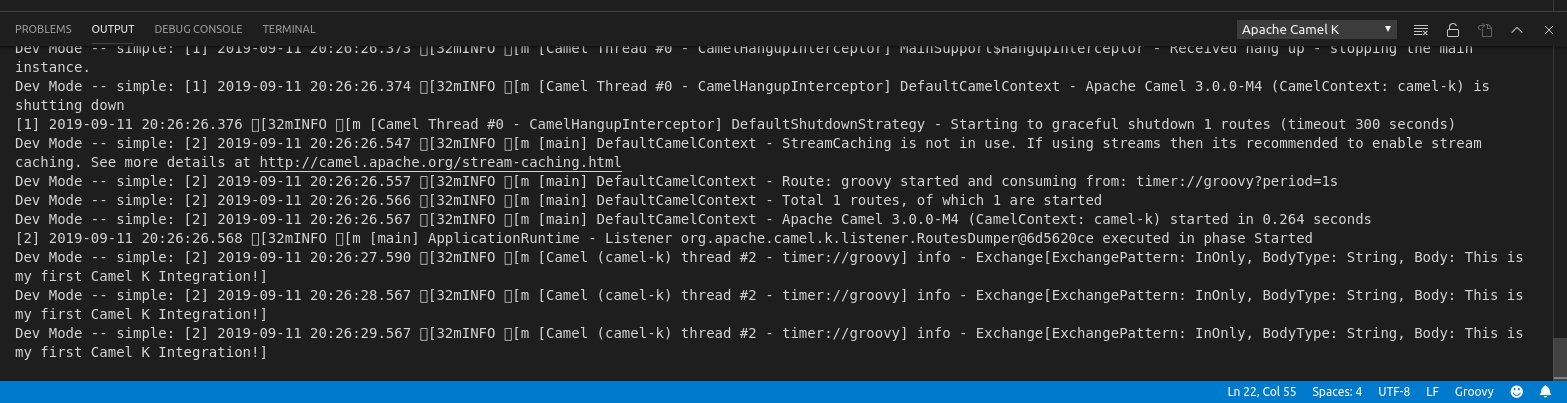
Dev Mode - Apache Camel K Integration in Dev Mode. - Watch as messages appear in the Apache Camel K Output channel as your integration begins to run.
- Open created file and update the message to say
This is my first Camel K Integration!. Save the file with File > Save or Ctrl+S. - Watch as your integration is updated and your new message begins to appear in the output channel.